

Creating Email Template
Email templates are ready-made message models used for electronic communication. They are structured to make sending recurring emails easier while maintaining the same layout, style, and message format. With them, it is possible to customize your email template, making communication more efficient and professional. These templates are widely used in marketing, customer service, sales, and other contexts that require consistent communication. They help save time, improve efficiency, and maintain a professional appearance regardless of how many emails are sent.
What do you need before you start?
Before creating your email template, it is important to ensure some prerequisites are in order so the process is quick and hassle-free. Customize your email template efficiently and prepare everything to ensure a professional result. Check out our checklist:
Have an active DNS: how to set up email in Hablla;
Have a user with the administrator.
First step: accessing the template creation area to customize your email template
1. To create an Email template, connect your account and go to the Studio. In the upper right corner of the screen, next to the initial of your name, you will find the Settings (gear) icon. Click it to open the settings menu.

2. On the left side of the screen in the Settingsmenu, locate the section Connections and integrations.

3. Select the Email.

4. Choose the email address where the template will be created.

5. In the submenu, select the option Message Template.

6. On the right side click the button + Create new template.

7. You will be directed to the email template creation screen, where you will find fields such as Template Name and Subject. Fill in these fields to start your template.
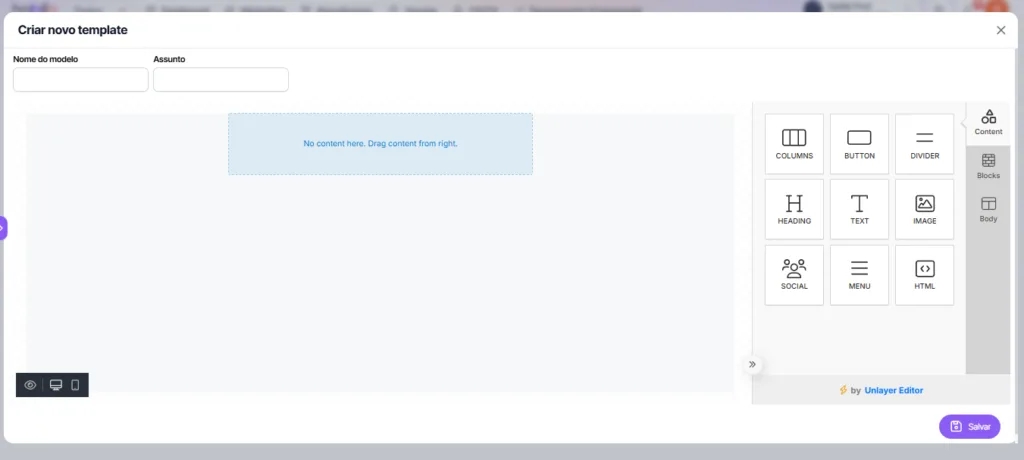
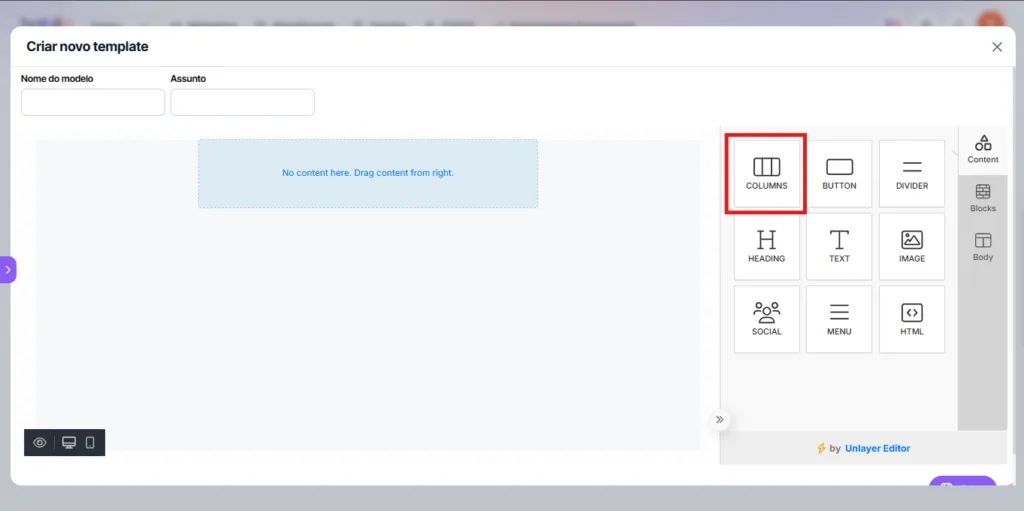
How to add columns
1. To add columns, click the columns element and drag it to the desired location in the template.
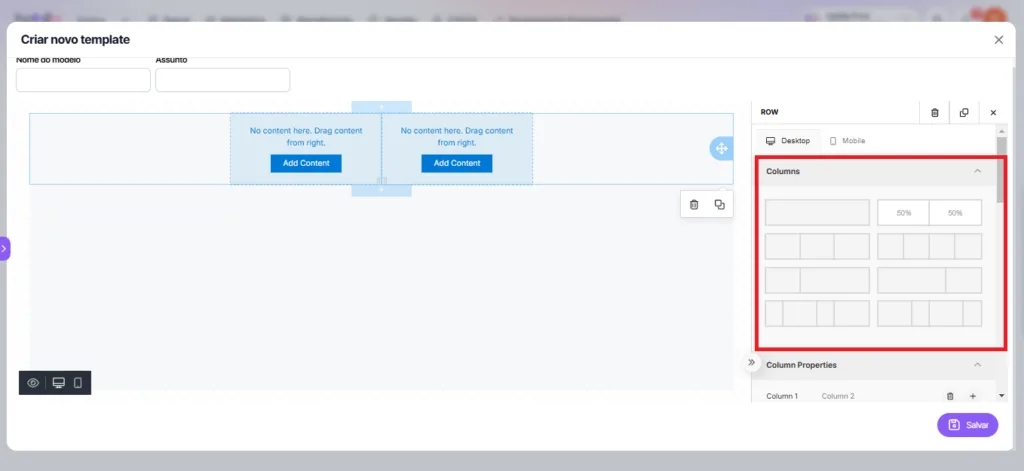
2. To configure the columns after adding them, go to the right side tab and select Columns. In this section, you can adjust the column split as you wish, customizing your template's layout.
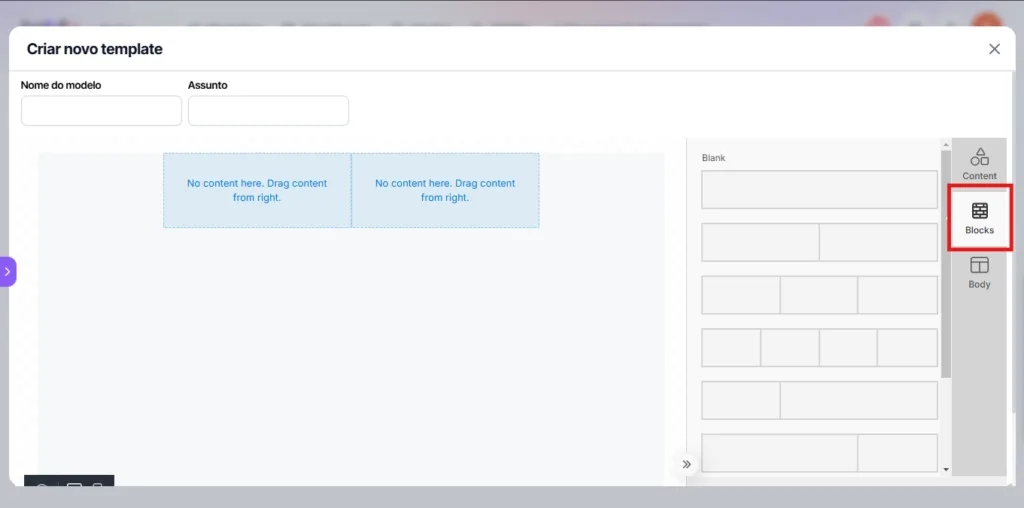
3. In the right side tab, go to Blocks to insert pre-divided blocks into columns, making content organization and structuring easier.
4. In Column Properties, you can customize the number of columns, adjust the background color, padding size, as well as the thickness, color, and style of the border.
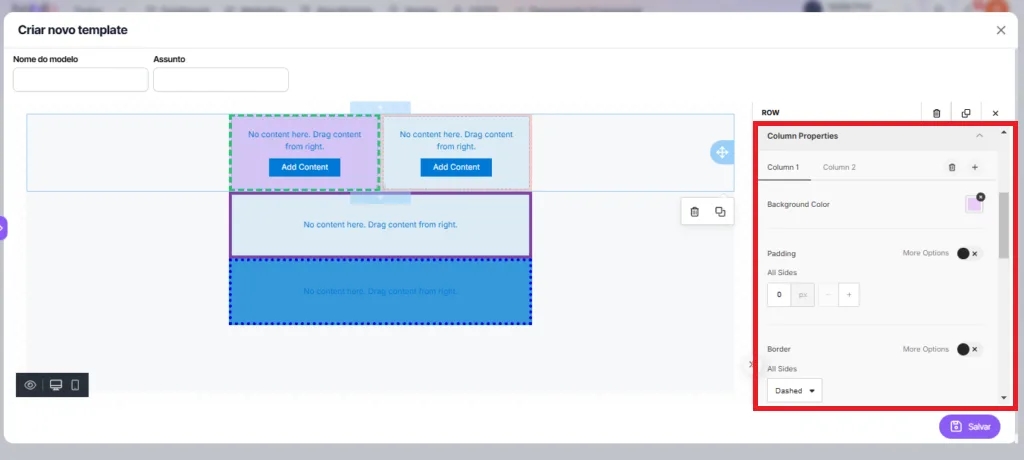
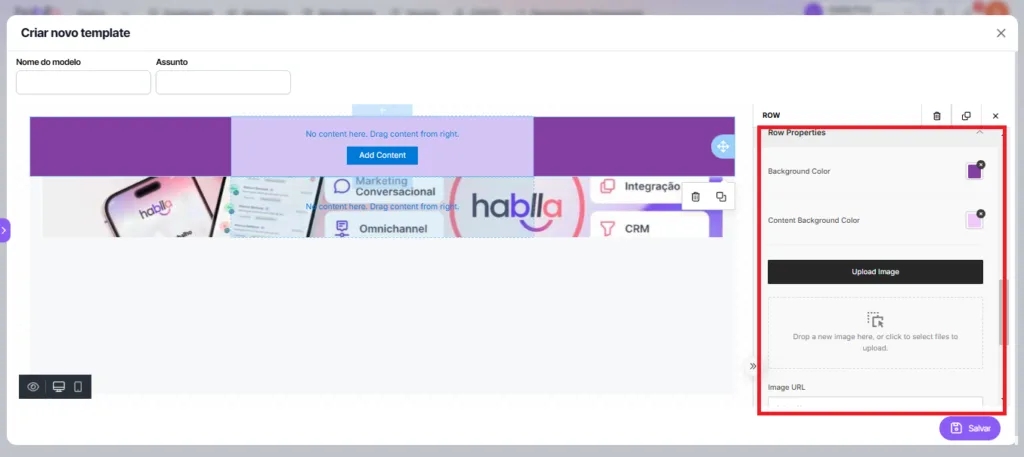
4. In Row Properties you can configure the row in which that column is. You can set the row background color, the content background color, add a background image, and set the padding.
5. In the Responsive Designsection, you can adjust settings so the layout automatically adapts to different screen sizes, ensuring your template looks great on mobile devices and desktops.

How to add buttons to your email
1. To add buttons, click and drag the element into the editing area.

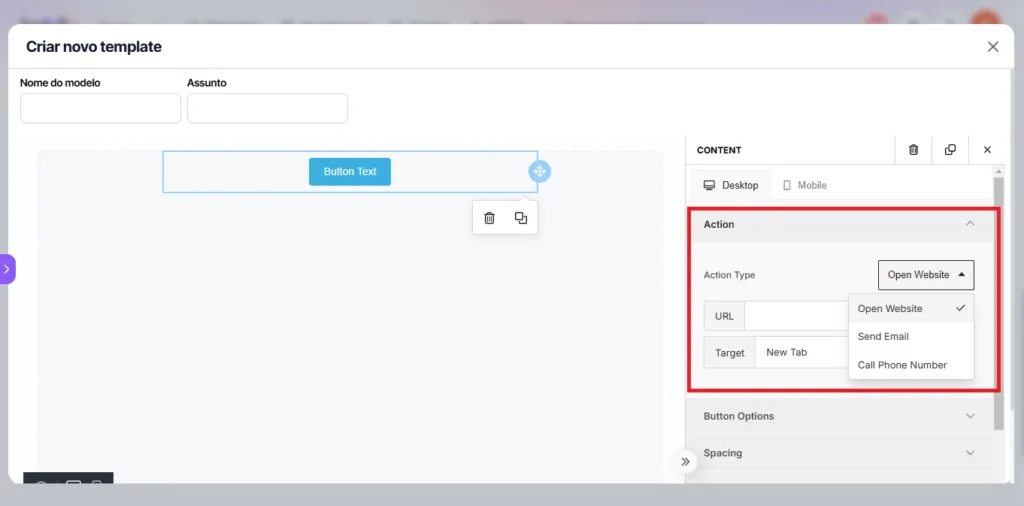
2. When you add the button, configure it in the right side tab. In Action, define the action the button should perform and the necessary details. For example, if the action is Open Website, just insert the desired website link.
3. In Button Options you can change the button's color and size, set the button text color, size and font, line spacing and letter spacing.


4. In Spacing, you can set the button alignment and size, the thickness and style of the border, and add rounded borders.


5. In the Generaltab, adjust the size of the container that holds the button.

Add divider
1. To add dividers, click and drag the element into the template.

2. Once added, you can configure the divider in the tab located on the right side. In Line you can change the size, thickness, style, and alignment of the divider.

Add headers
1. To add headers, click and drag the element into the template.

2. Once added, you can configure the header in the tab located on the right side. In Text you can define the header type, font, size, color, text alignment, line height, and letter spacing.


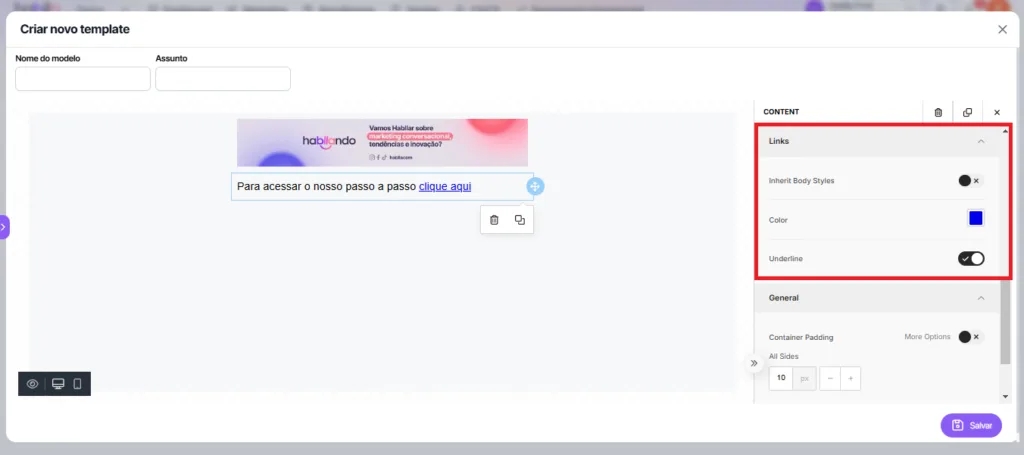
3. To insert a link in your text, click and select the word or phrase where you want the link, then find the link icon (usually a chain) in the toolbar, paste the desired URL and confirm. Done! The link will be active in the text.
Add text
1. To add text, click and drag the "Text" element to the template in the desired position. Then release and start writing!

2. Once added, you can configure the text in the tab located on the right side. Text settings are the same as header settings.
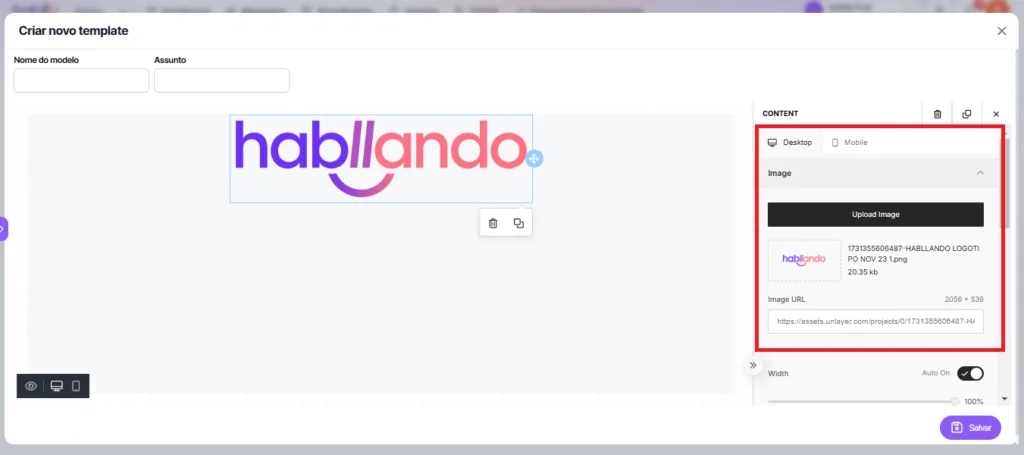
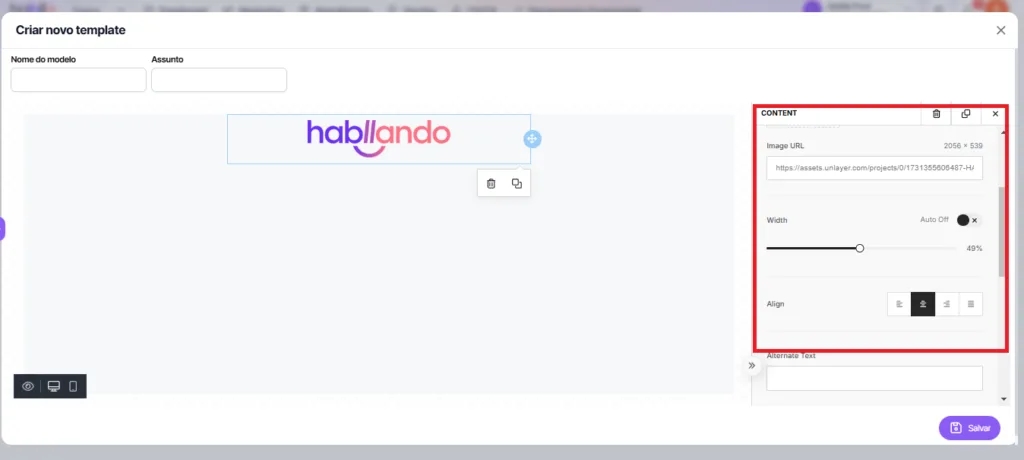
Add images
1. To add images, click and drag the element into the template.

2. Once added, you can configure the image in the tab located on the right side. In Image you can upload the image, add the image link, set its size, alignment and alternative text.
Add social media icons
1. To add social media icons, click and drag the element into the template.

2. Once added, you can configure the icons in the tab located on the right side. In Icons, you can select the icons you want, change their shape, link them to a URL and set their size, spacing and alignment.

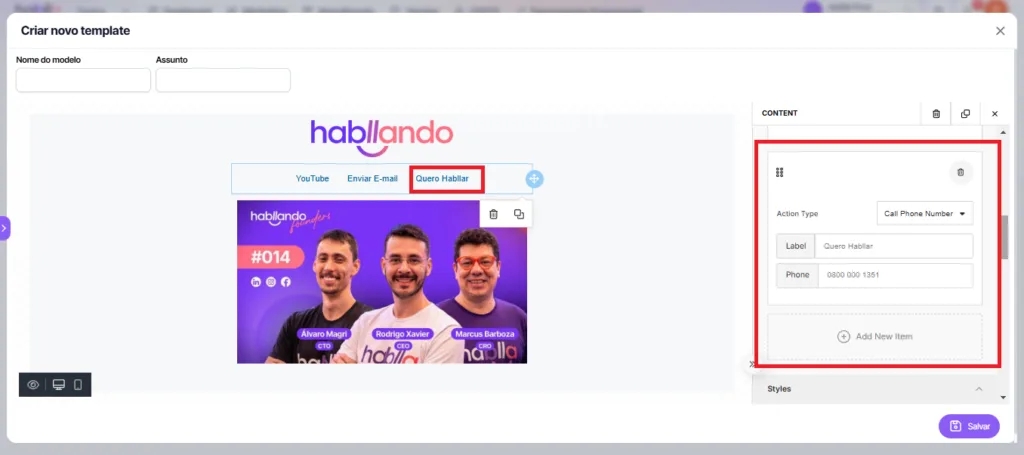
Add navigation menu
1. To add a menu, click and drag the element into the template.

2. Use the Menu to create navigation options in your template. You can add links to different pages, configure a button for direct email or even a button that allows the user to call a specific number.
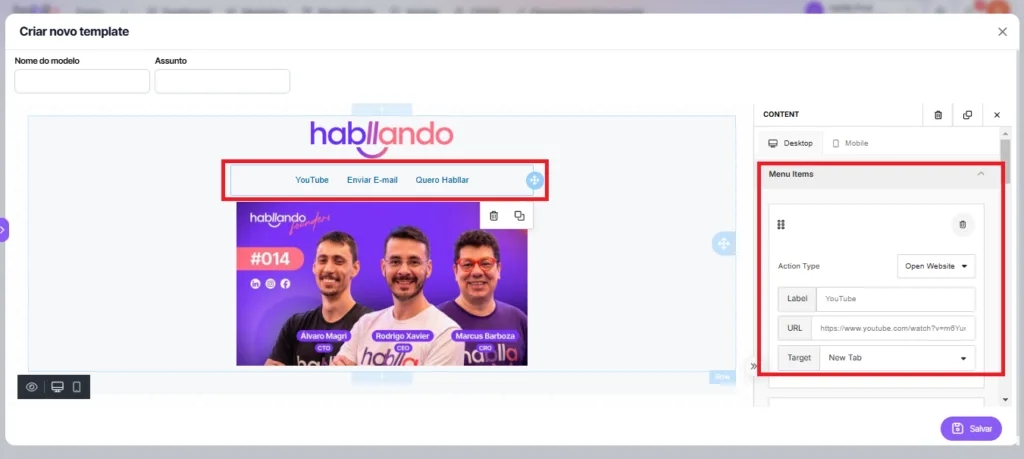
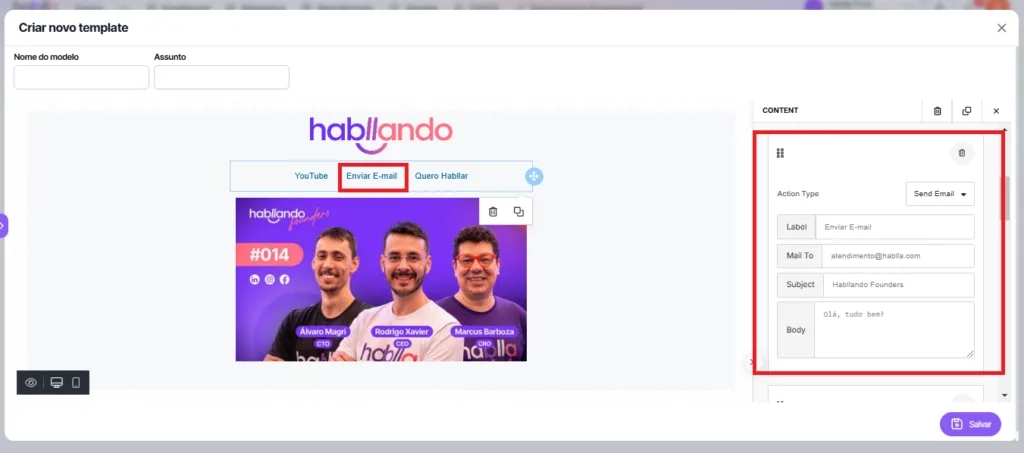
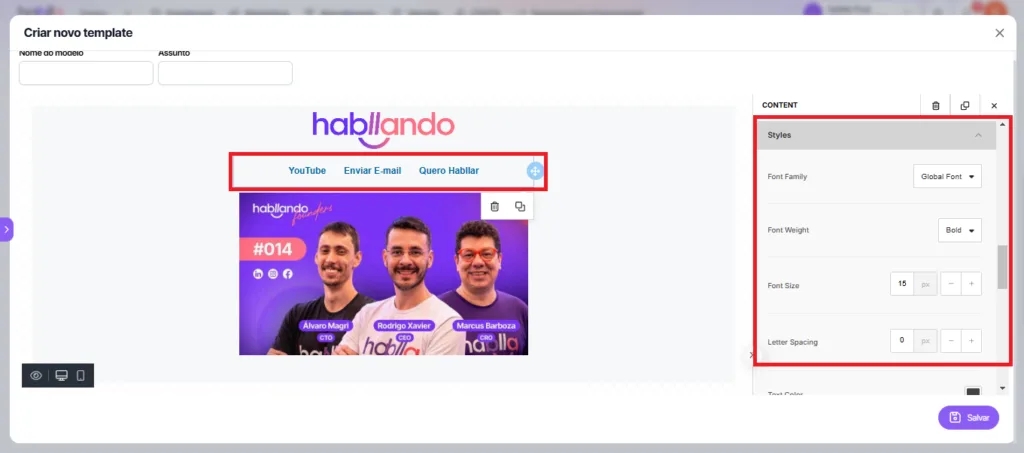
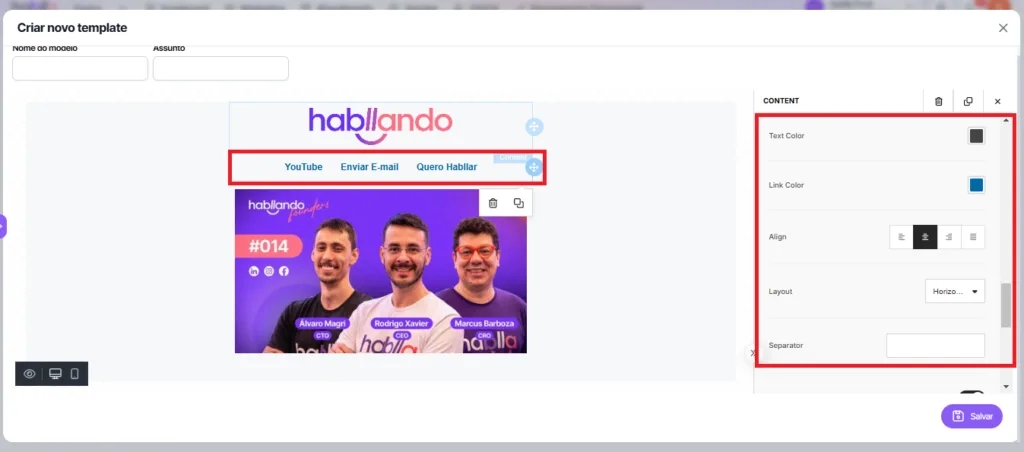
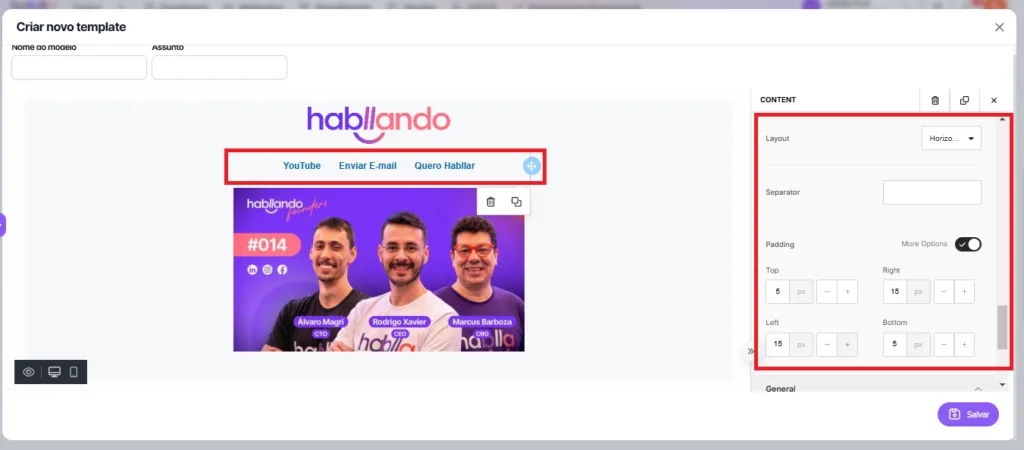
3. Customize your Menu in Styles. In the Stylessection, you can adjust the font, size, text color and letter spacing in your Menu. Additionally, you can choose the alignment, set a separator between items, configure the menu layout and customize the link colors.
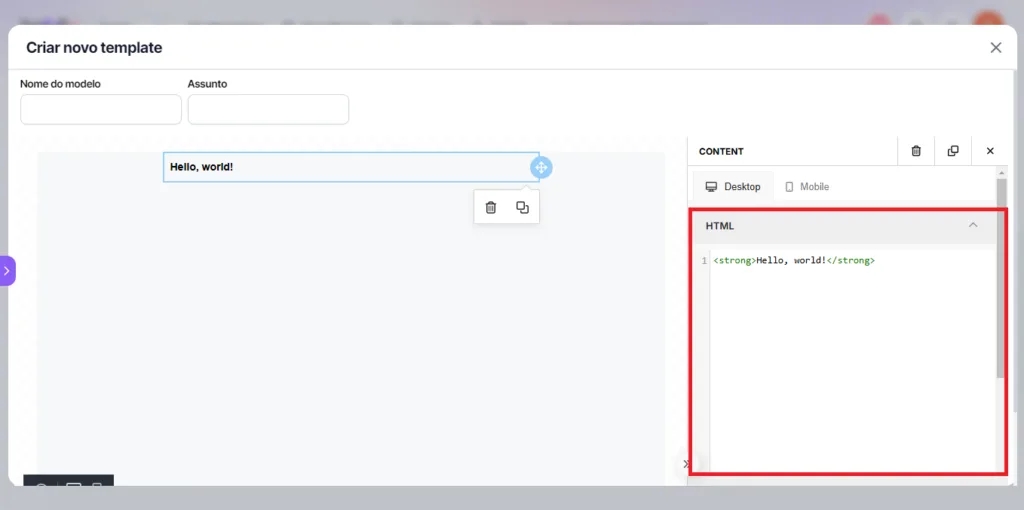
Add HTML code
1. Click and drag the HTML element to the template in the desired position. This will allow you to add HTML custom content to the design, creating unique elements tailored to your style. After dropping it, just paste the desired code!

2. After adding the HTML element to the template, go to the right side tab to make adjustments. In this section, you can insert any code you want, adapting the design with the HTML custom content.
Configure template body
In the side Menu Body you can configure the entire body of the template. By accessing the submenu General, you can set the text and background color, the size and alignment of containers, as well as customize the font and text size for the whole email structure.

Duplicate or delete
1. To delete a row, click the first icon below it. To duplicate, click the second icon. These options make quick editing of your template layout easier.

2. To create a copy of the template, just select the indicated icon for duplication and then rename the copy as you wish. This allows you to keep the original and make adjustments to the new version


Attention: once created, the template cannot be deleted. Therefore, review carefully before finalizing to ensure everything is as expected.
Mobile
Want to see how your template looks on a phone? It's easy! Just click the option Mobile on the right tab or the phone icon in the left corner. Try it now and see how the design adapts to smaller screens

Preview
1. To see how your template will look, just click the indicated icon. This way, you can check everything before finalizing.

2. To adjust the preview, you can select the type of device (such as desktop, tablet or phone) on which you want to view the template. This helps ensure the design looks perfect on any screen.

Save
Once the template is ready, select Save to save it.

Start now to customize your email template!
Now that you know all the available submenus and how each can be used, it's time to explore and put your creativity into practice. Customize your email template with ease, making simple adjustments and previewing changes in real time. Remember to save your progress along the way and test the mobile version to ensure your template is perfect on all devices.
With these tools, you have everything you need to create an amazing, functional email aligned with your brand. Have fun and customize your template until it looks exactly the way you want!
Last updated
Was this helpful?