> For the complete documentation index, see [llms.txt](https://docs.hablla.com/llms.txt). Markdown versions of documentation pages are available by appending `.md` to page URLs; this page is available as [Markdown](https://docs.hablla.com/hablla-docs-en/hablla/settings/connections-and-integrations/whatsapp/step-by-step.md).
# Step by Step
Setting up WhatsApp in Hablla is a simple and effective process that will allow your company to connect with customers quickly and professionally. To make it easier to understand, we divided the process into three main steps:
* First step - Connection in Hablla
* Second step - Connection in Meta
* Third step - Activating the number in Hablla
### **What do you need before you start?**
Before starting the configuration process, it is essential to ensure that some prerequisites are met to avoid errors and delays. To facilitate this process, we created a detailed checklist (see below), which covers everything needed for the integration to be successful:
1. **Create a** [**Sector**](https://docs.google.com/document/d/1aq2mB02UO2RsT9YMalaXGEMrEV-RN1V2AtvNfseUw0M/edit?fbp=fb.1.1750773282927.8266088573585080\&sck=a62d3376-49e7-43d6-a994-af1e2bb75c92\&external_id=a62d3376-49e7-43d6-a994-af1e2bb75c92) **in Hablla:** creating a department in Hablla is essential to organize and categorize your company's interactions with customers.
2. **Active Phone Number:** the phone number you plan to use for WhatsApp Business must be **active**, ready to receive **calls** and **SMS**. this is essential, as WhatsApp sends confirmation messages during setup.
**Why it is important**: if the number is not active or not configured to receive messages, you will not be able to complete the WhatsApp verification process.
3. **Meta Business Manager:** your company must have a **active account in Meta Business Manager (Facebook)**. If you do not have one yet, you will need to create it. Make sure you have **administrator access** to that account.
**Why it is important**: WhatsApp Business API uses Meta's infrastructure to operate. Without a properly configured Business Manager, it will not be possible to complete the integration with Hablla.
4. **Personal Facebook Profile:** make sure you have a **personal Facebook profile** and that this profile has **administrator permissions** within Meta Business Manager.
**Why it is important**: only Business Manager administrators can complete the integration with the WhatsApp Business API. A profile without the proper permissions will not be able to finalize the process.
5. **Dedicated Number for WhatsApp Business:** the number you intend to use for WhatsApp Business cannot be linked to any other WhatsApp account (including the standard WhatsApp app or WhatsApp Web). If it is, you will need to **unlink or delete** the account before continuing.
**Why it is important**: a phone number can be associated with only one instance of WhatsApp. Using the same number across multiple platforms can result in connection errors and communication failures.
6. **Active Company Website**: make sure that the **your company's website is active**, containing all relevant information and accessible. The website may be required for your company's validation with Meta.
**Why it is important**: Companies using the WhatsApp Business API must have an established online presence so Meta can validate the authenticity of the business. An outdated or inaccessible website can delay this process.
7. **IVR/PBX (Interactive Voice Response/Telephone Switchboard)**: if the phone number you will use is associated with an **IVR or PBX system**, it will be necessary to **temporarily disable** this functionality during setup. The IVR can prevent WhatsApp from sending the verification code needed to activate the number.
**Why it is important**: the IVR/PBX can interfere with receiving the calls and SMS messages needed to verify the phone number. Temporarily disabling these services ensures you receive the activation code without issues.
8. **Activation Verification on Other Platforms**: check if the phone number to be used **is not active** on other messaging platforms, such as other WhatsApp API providers.
**Why it is important**: a phone number linked to multiple platforms can cause conflicts and prevent the correct activation of WhatsApp in Hablla.
### First step - Connection in Hablla
To connect WhatsApp Business to Hablla, you need an **Administrator account** in Hablla and a **active WhatsApp Business number** active.
1. Once logged into your account, access the [**Studio**](https://studio.hablla.com/workspace/643d802021b6aa9234eb9797/marketing?fbp=fb.1.1750773282927.8266088573585080\&sck=a62d3376-49e7-43d6-a994-af1e2bb75c92\&external_id=a62d3376-49e7-43d6-a994-af1e2bb75c92). In the upper right corner of the screen, next to the initial of your name, you will find the **Settings** (gear) icon. Click it to open the settings menu.
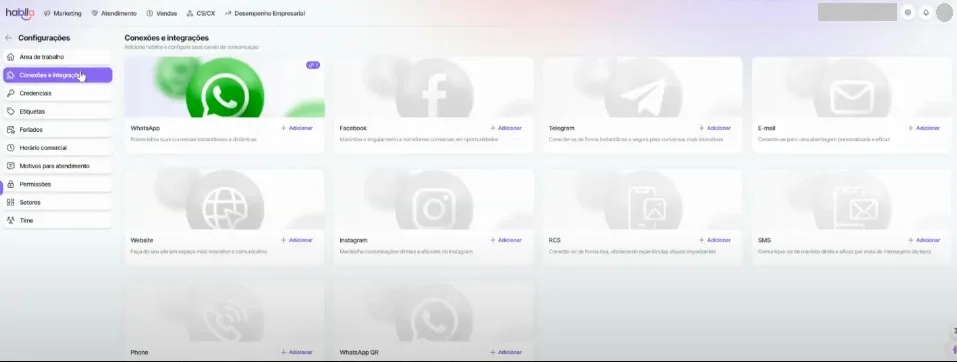
2. On the left side of the screen in the Settings menu, locate the **Connections and Integrations**.
3. On this same screen you will find the WhatsApp integration, just click on the **+Add** on the **WhatsApp**.
4. You will be directed to the WhatsApp configuration screen. To continue, click on **Start**.
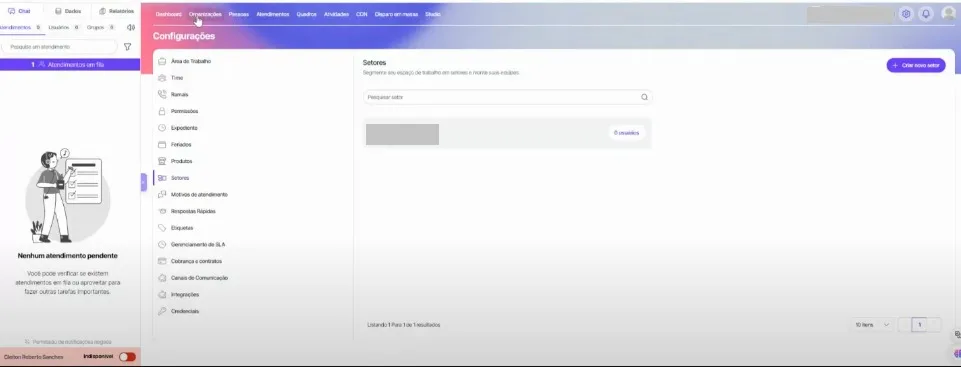
5\. Select the support department you want, according to the desired area, and then click the **Ok**. For example, if you are from the Sales department, click this option. If it does not exist, create the department in Hablla before starting the integration procedure
6\. Click on **Connect to WhatsApp** to take the next step toward integration!
### Second step - Connection in Meta
1\. A new pop-up tab from the **Facebook** will appear on your screen. Just log in with your credentials and continue.
2\. Next, select the desired profile and click **Continue as \[your username]**.
3\. Click on **Get Started.**
4\. Choose your company's details in **Business portfolio** or fill in the required information if you have not yet created the portfolio. Then click on **Next**.
5. You must select or create your WhatsApp Business account and choose a profile. Then click on **Next**.
6. If you need to create a new WhatsApp Business profile, fill in the fields with the *account name*, the *display name* and choose the *category* that best represents your company. Then click on **Next**.
7. Add a phone number to be used on WhatsApp. Important: it cannot be connected to WhatsApp. Then choose the verification method you prefer. Then click on **Next**.
8. You will receive a verification code, which you must enter in the available field and click on **Next**.
9. If the number verification was successful, you will see the next screen. Click on **Continue** to proceed.
10. All set! Your setup is complete! Click on **Finish.**
### Third and final step - Activating the number in Hablla
1. After completing the process in Meta, return to the [Hablla Studio](https://studio.hablla.com/workspace/65c52bdca5eddbc1df810374/marketing?fbp=fb.1.1750773282927.8266088573585080\&sck=a62d3376-49e7-43d6-a994-af1e2bb75c92\&external_id=a62d3376-49e7-43d6-a994-af1e2bb75c92) and click on the **gear** in the upper left menu. This will open the settings menu, where you can proceed with the WhatsApp configuration
2. Access again on the left side of the screen the settings menu section **Connections and Integrations**.
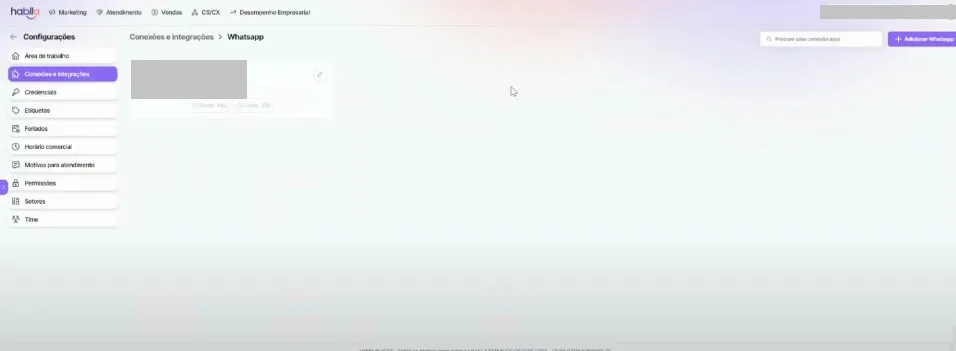
3. Click on the WhatsApp menu
4. You will see that the connection has been created but is still inactive, because this number has not received any message so far. The next step is to send a "hi" to this number from any WhatsApp account to activate it.
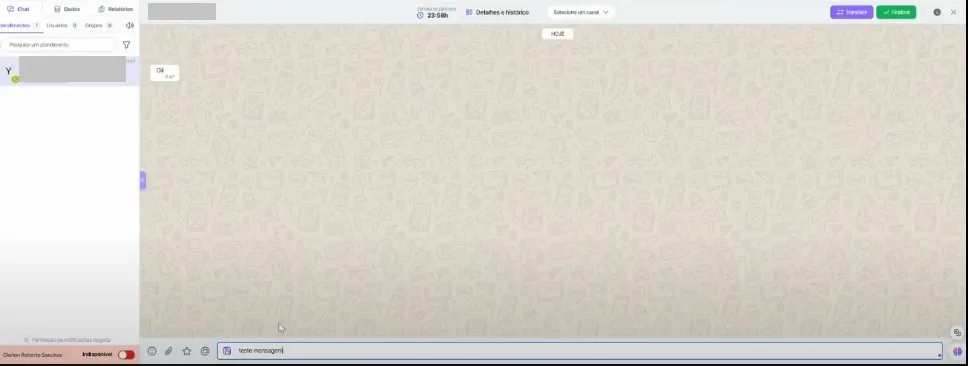
5. Access the [Hablla App](https://app.hablla.com/workspace/643d802021b6aa9234eb9797/services/all?fbp=fb.1.1750773282927.8266088573585080\&sck=a62d3376-49e7-43d6-a994-af1e2bb75c92\&external_id=a62d3376-49e7-43d6-a994-af1e2bb75c92) and note that, on the left side of the screen, there will be a section called **Queued Support**. Click the purple bar to access it.
6. Here, you can reply to the message to test the WhatsApp support window and ensure that the integration is working correctly.
7. Go back to Hablla Studio and access the **Connections and Integrations**. Select WhatsApp and check if the icon is now active, indicating that the integration was successfully completed.
8. Done! Now you can start serving your customers through the Hablla platform! Take advantage of this new connection to offer even faster and more effective service.
---
# Agent Instructions
This documentation is published with GitBook. GitBook is the documentation platform designed so that both humans and AI agents can read, navigate, and reason over technical content effectively. Learn more at gitbook.com.
## Querying This Documentation
If you need additional information that is not directly available in this page, you can query the documentation dynamically by asking a question.
Perform an HTTP GET request on the current page URL with the `ask` query parameter:
```
GET https://docs.hablla.com/hablla-docs-en/hablla/settings/connections-and-integrations/whatsapp/step-by-step.md?ask=
```
The question should be specific, self-contained, and written in natural language.
The response will contain a direct answer to the question and relevant excerpts and sources from the documentation.
Use this mechanism when the answer is not explicitly present in the current page, you need clarification or additional context, or you want to retrieve related documentation sections.


 5\. Select the support department you want, according to the desired area, and then click the **Ok**. For example, if you are from the Sales department, click this option. If it does not exist, create the department in Hablla before starting the integration procedure
 6\. Click on **Connect to WhatsApp** to take the next step toward integration!


 6. If you need to create a new WhatsApp Business profile, fill in the fields with the *account name*, the *display name* and choose the *category* that best represents your company. Then click on **Next**.
 7. Add a phone number to be used on WhatsApp. Important: it cannot be connected to WhatsApp. Then choose the verification method you prefer. Then click on **Next**.

 9. If the number verification was successful, you will see the next screen. Click on **Continue** to proceed.