> For the complete documentation index, see [llms.txt](https://docs.hablla.com/llms.txt). Markdown versions of documentation pages are available by appending `.md` to page URLs; this page is available as [Markdown](https://docs.hablla.com/hablla-docs-en/hablla/settings/temporary-access.md).
# Temporary Access
The **Temporary Access** allows you to grant administrative access to your Hablla workspace for a specified period, without needing to create or maintain a new administrator user permanently in the environment.
This feature is mainly used when the Hablla team needs to access the workspace to carry out **support, technical analysis, implementation, or contracted service delivery**.
When creating temporary access, you define **who can access the workspace, what the purpose of the access is, and until when it will remain available**. After the specified date and time, the access will expire.
{% hint style="danger" %}
**Attention:** a Temporary Access grants the user permissions at the **administrator level** within your workspace. This means that, during the validity period, the user will be able to access the same areas and features available to an environment administrator.
For security, we recommend using this feature **only to grant access to official Hablla team members** and only when requested through official communication channels.
{% endhint %}
### How to grant Temporary Access
To perform this configuration, you need to have **administrator permission** in the workspace.
#### 1. Access the Workspace settings
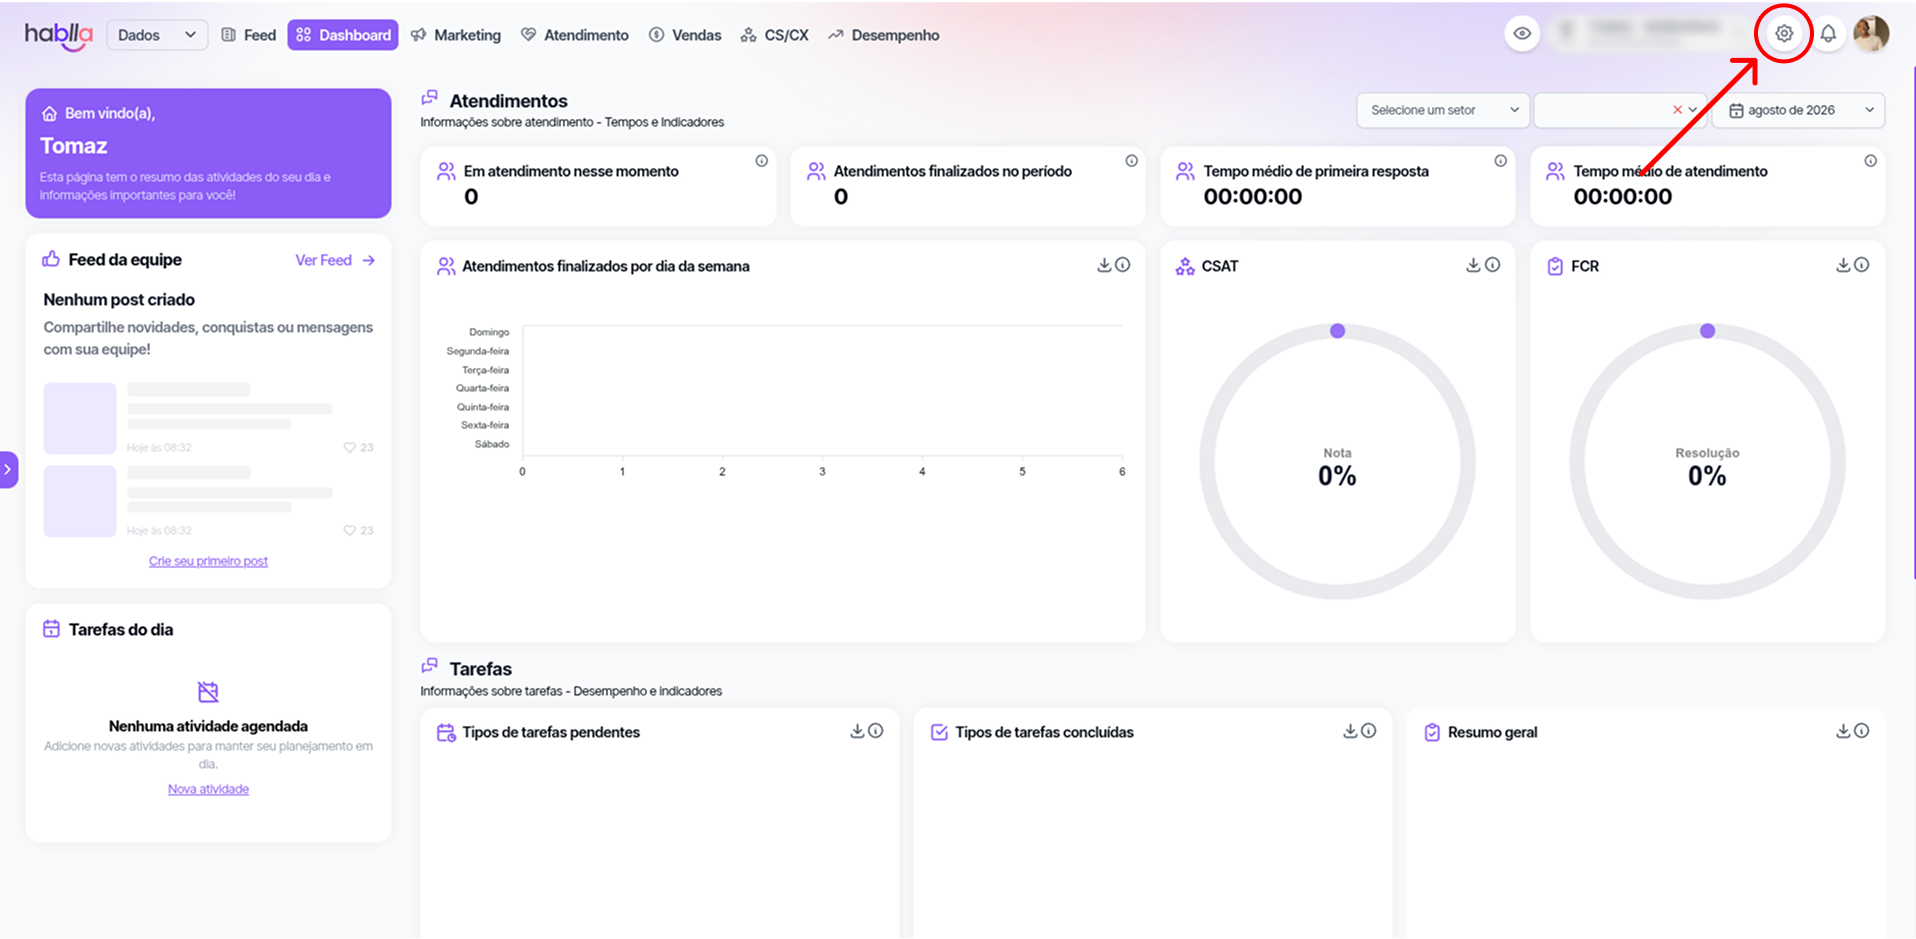
Inside the **Hablla Studio**, click the **gear**, located in the upper-right corner of the screen.
#### 2. Access the Temporary Access option
In the workspace settings, locate the menu available on the left side of the screen and click the **Temporary Access**.
#### 3. Add a new Temporary Access
On the **Temporary Access**, you will be able to view all temporary accesses registered in your workspace.
To add a new access:
* Click the **+ Add Access**, located in the upper-right corner of the screen.
* In the window that will be displayed, fill in the fields **Purpose**, **User Email** and **Expires On**.
* Check the completed information.
* Click the **Add access** to finish.
After completing these steps, the specified user will be able to access your workspace using the granted Temporary Access, respecting the configured expiration date and time.
### Understand the Temporary Access fields
When adding a new Temporary Access, you will need to fill in three pieces of information. Understand below the purpose of each of these fields.
#### Purpose
In this field, you must inform the reason the access is being granted. We recommend using a description that makes it easy to identify in the future, **why that access was created**.
Some examples:
* `Support case analysis by the Hablla Support team`
* `Project implementation by the Hablla Services team`
#### User Email
In this field, you must inform the **email address of the user who should receive the Temporary Access**.
{% hint style="warning" %}
Make sure to enter exactly the email provided by the Hablla professional who requested access. Do not grant Temporary Access to unknown addresses or to addresses that have not been previously confirmed through official channels.
{% endhint %}
#### Expires On
In this last field, you only need to define the **date and time when the Temporary Access should expire**. Use the date picker to determine until when the user can access the workspace. After the configured date and time, access will be automatically expired.
{% hint style="info" %}
We recommend setting an access period compatible with the activity to be performed, avoiding keeping administrative permissions available for much longer than necessary.
{% endhint %}
### Conclusion
After clicking **Add access**, the permission will be granted to the email provided and will remain available until the **date and time of expiration defined**. From that moment on, the authorized professional will be able to access the workspace to perform the necessary activity.
{% hint style="success" %}
After the activity is completed, keep only the accesses that are still necessary. Using time-limited accesses helps prevent administrative permissions from remaining available beyond the necessary period.
{% endhint %}
---
# Agent Instructions
This documentation is published with GitBook. GitBook is the documentation platform designed so that both humans and AI agents can read, navigate, and reason over technical content effectively. Learn more at gitbook.com.
## Querying This Documentation
If you need additional information that is not directly available in this page, you can query the documentation dynamically by asking a question.
Perform an HTTP GET request on the current page URL with the `ask` query parameter, and the optional `goal` query parameter:
```
GET https://docs.hablla.com/hablla-docs-en/hablla/settings/temporary-access.md?ask=&goal=
```
`ask` is the immediate question: it should be specific, self-contained, and written in natural language.
`goal` is optional and describes the broader end goal you are ultimately trying to accomplish on behalf of the user. GitBook uses it to tailor the answer towards what is most useful for that goal.
The response will contain a direct answer to the question and relevant excerpts and sources from the documentation.
Use this mechanism when the answer is not explicitly present in the current page, you need clarification or additional context, or you want to retrieve related documentation sections.